
How to live stream a funeral: the complete guide
Live streaming a funeral is becoming more and more popular, as streaming technology is enabling families and friends to stay connected during the difficult time of losing a loved one.
From distance, to mobility issues or venue capacity restrictions, there are plenty of reasons why clients get in touch. We know it’s important to get it right, so we’ve compiled a comprehensive 8 step guide on how to live stream a funeral:
1. Choose a live stream method
There are three main ways in which you can live stream a funeral:
Our most sought-after service is our professional live stream – which includes an experienced and discreet live stream camera operator, full HD audio-visual equipment, access to a reliable, professional-grade funeral live streaming platform, and a private viewing page designed to reflect your loved one. You also receive a downloadable copy of the video to keep afterwards. Prices start at £495, and if you are using our professional service, you don’t need to worry about any of the following steps as one of our professionals will take care of it all for you.
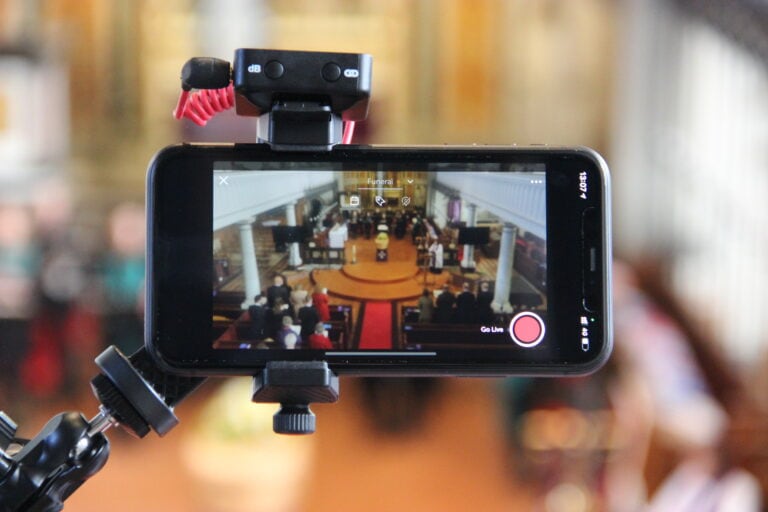
Another option is the stream it yourself service. This allows you to benefit from both the professional-grade live streaming platform and the bespoke private viewing page, but instead of using a professional operator you film it live from your own smartphone or device (ipad or laptop). You receive complete privacy (viewing page can be password-protected and is only ever viewable to those you share the link with), and if you’re unsure how to live stream a funeral, you receive the full support of our expert team should you need a hand in setting up. This is a more budget-friendly option at £95.
There is also the free option to use Facebook or YouTube Live services, but please do bear in mind the risks involved with using these platforms – including lack of privacy (stream can be visible to the general public or full contact lists rather than select individuals you have invited), lack of streaming support and potential access issues for guests. At the very least, you may want to stream to a private Facebook Group or unlisted YouTube event.
2. Check the internet connection
Most of the worries around how to live stream a funeral stem from potentially having a poor connection. Preparation is key, so once you’ve selected the most suitable method, you want to ensure that the funeral venue has a stable internet connection. In order to maintain a reliable connection in full HD, you will need an upload speed of at least 4-8Mbps, which generally requires 4G signal or a broadband connection. Read more here on how to check your internet connection for live streaming or use Ofcom’s signal checker.
3. Test the equipment
If you are streaming yourself, test the camera, microphone, and any other equipment you will be using beforehand to ensure that they are working correctly. We always recommend testing equipment ahead of the day of the service, to avoid any last-minute issues that may arise.
There are some further factors to take into consideration if you are streaming the funeral yourself, including:
- The quality and model of your smartphone: the latest iPhone and Android devices will have a camera that is adequate for a stream. However, you may find that older devices do not capture the clear image needed for a stream.
- Sound quality: your phone’s microphone may pick up some background noise in the room. Consider attaching a microphone near the lectern phone to clearly hear those speaking over the noise of people in the room.
- Battery life: running a live stream requires a lot of processing power, so your device’s battery life will drain faster than usual. Consider using a portable battery alongside your phone if you expect to be streaming for a while.
4. Determine the viewing permissions
Make sure that you have permission from the family members and the funeral venue to live stream the funeral. You also need to determine if the stream will be public or private (due to the sensitive nature of funerals and in-person guests, we always recommend private streams – our services are always private by default via a sharable link).
5. Plan the stream
Plan the order of events for the funeral and decide which parts will be included in the stream, and if you need to move the device or microphone at any stage. It’s usually worthwhile checking in with the celebrant or venue manager for their guidance at this stage. It is important to be respectful of the family’s wishes and not include anything they do not want to be shared.
6. Assign someone to manage the stream
Assign someone to manage the stream and be in charge of physically recording throughout. They should conduct tests ahead of streaming that the device, connection, volume and lighting is set up as expected, and monitor the stream throughout the service.
7. Start the stream
If you’re especially unsure of how to live stream a funeral, or if this is your first time using this technology, it’s always best to begin the stream a good 10 minutes before the service starts, to allow viewers time to join.
8. End the stream
When the service is over, end the stream once you’re happy to do so. If you’re using any of our services, the recording will be automatically available for playback in case someone was late to join or if you wish to view it again. If you aren’t, be sure to manually save the recording for later viewing.
By following these steps, you can ensure a respectful and seamless live stream. Live streaming a funeral ensures that those who cannot attend the service in person still get to be a part of the service and say their goodbyes. We take the integrity of our services very seriously for this reason, so if you’re still unsure how to live stream a funeral, please do get in touch and a member of our team will be able to talk you through the process.